Freestanding lace ellipse table runner instructions
 As our visitors showed great interest in the way our 10332 Freestanding lace table runner set is prepared, we are publishing the instructions for its preparation.
In general, they are almost the same, as the other tutorials for designs of this type. There is however an interesting solution Stacy has come up with for correct placement and easy attaching of the freestanding lace edge.
The design featured in this tutorial is the SKU 10332 Freestanding Lace Table Runner Set.
In order to create this fine freestanding lace embroidery decorated table runner you will need:
- Our Free standing lace floral table runner set : 10332 FSL Table Runner Set
- Water-soluble stabilizer suitable for stitching out freestanding lace (we prefer Vilene DO104)
- Suitable machine embroidery thread: We find that polyester thread is especially suitable for these designs. In order to have the stitched out embroidery look the same on both sides, we would recommend that you use the same upper thread and bobbin thread.
- Suitable fabric of your choice (we have used linen to create the table runner featured on our site). Since some fabrics tend to shrink, you may want to dip the fabric in water for 2 hours before using it and then dry and iron it.
Step-by-step instructions for creating the table runner
 1. Hoop the water-soluble stabilizer. Depending on the type of stabilizer you are using, you have to hoop from a minimum of 2 and up to 4 layers. Make sure it is hooped very tight and stays that way throughout the whole process of stitching out.
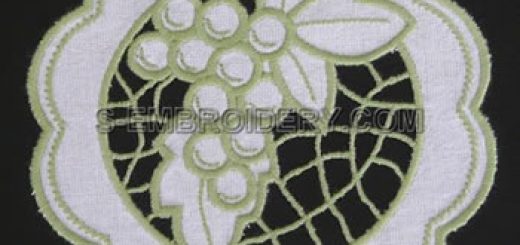
2. Stitch out the free standing lace design components.
In order to prepare the table runner featured on our site, you will need to stitch 2 times all six embroidery designs, included in the set. Carefully cut off the loose thread ends you get in the process of stitching (at the beginning or when changing thread).
3. You will have noticed by now that each of the six embroidery designs in the set seems to consist of 2 parts, which are not attached to each other in any way. This is NOT a mistake. This is the way they should be stitched out and they should stay in this way.

There have been many questions how does one attach the freestanding edge to the fabric. Well, we guess the answer is clearly visible on these images. Each piece of the lace edge is designed so, that it is stitched in the same hoop with its adjacent piece of the inner part of the table runner. This is a very simple and yet very effective way our designer Stacy has found to make the correct placement and attaching of the lace edge to the runner as easy as it is only possible.
So, please when cutting away the excess stabilizer do NOT separate the 2 parts of each design. They MUST stay together on the water-soluble stabilizer as shown on the image.

4. Connect the components to each other with manual stitches from the back side. Use the same thread you used to stitch out the designs. The places to apply the stitches are marked with red on the image. You will not make a mistake, if you put a stitch or two in ALL places where two components touch each other.

When you have connected all freestanding lace pieces you should have something like this:

5. Place the connected freestanding lace components face up on top of the fabric. You can attach the lace to the fabric with pins or with temporary manual stitches. We prefer to use the second method, as it usually is better at holding the lace and fabric together.

If the colors of the lace and your fabric are very similar, you may want to trace the outline of the lace. Use an invisible marking pen. This will make stitching easier. The ink from this pen will disappear usually after 5-10 minutes once you place the material in water or after 24 hours. Although such pens are considered absolutely safe, we would recommend that you test it with your thread / fabric. Just to be on the safe side.

6. Stitch the free standing lace to the fabric using machine zigzag stitch. We used a 3 mm stitch with a density of 0.5 mm. Remember that you will have to do 3 passes in order to connect the lace to the fabric. Do this along the 3 perimeters which are clearly visible on the images.

When you have stitched the freestanding lace and the fabric together:
7. Very carefully cut away the excess fabric from below the lace parts of the table runner. Please take it easy and make sure you do not cut the thread.


After cutting away the fabric – dip the table runner in water until the stabilizer has been completely dissolved.
8. Let the table runner dry on an towel and then iron it.
Congratulations! Your lace decorated table runner is ready.

For more fine freestanding lace embroidery designs you will want to visit our machine embroidery catalog.